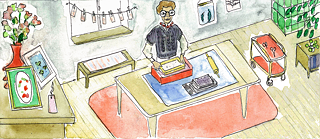
Why not write a letter again? And why not make the paper for it yourself? Granny Trude is using the quiet pre-Christmas period to get creative – with the help of a picture frame, blender and clothesline.
My dears,The year is drawing to an end, a year like we’ve never experienced before. Corona has a firm hold on our lives, our contacts are severely limited again, we’re still wearing face coverings and social distancing from one another. Sad and stressful though it is, I’d like to get myself into a positive mood so I might even enjoy the Advent period a little. That’s why I’ve already got candles on all my windowsills – and to distract myself I’m having a think about Christmas gifts.
The patience of paper
What was the outcome? Christmas cards and presents made of handcrafted paper for my loved ones. I felt a great need for something grassroots, something handmade. All those video calls over the past few months with children, grandchildren and great-grandchildren were all well and good, but now I urgently need a paradigm shift: letters that arrive by post – and aren’t bills – as well as ink and a personal signature, like the old days, really.However, we do need more time to get a thought down on paper than we do to send it through the airwaves as a spoken message. But it also gives us the opportunity to express ourselves in a well-considered manner. I like this idea: why not slow down our high-speed world a little here and there, and use the dreadful boredom caused by restricting our contacts for creative purposes?
Versatile
I don’t want to come on all philosophical though. I’d rather explain to you how simple it is to make beautiful paper presents. You can either use the paper for your own Christmas post, or give your loved ones writing paper sets as gifts. Of course the charm of home-made paper is that it can be very coarse and thick. So I’ve glued some thin paper inside my folded cards that’s easier to write on.Small presents such as bookmarks or Christmas decorations are quickly crafted once you’ve produced the paper. Larger sheets also make wonderful gift wrap. Or you can tie a paper sleeve around a gift wrapped in brown parcel paper – it looks ever so pretty. Go ahead and give your imagination a free rein! By the way – paper making can even be a lovely activity to do with children.
What you need
Not much – you’ve probably got most of it at home. But I recommend that you watch a short video about paper-making on the internet, then you’ll know for instance what a mould frame is meant to look like and the best way of using it.- mould frame – you can buy one, knock one together yourself, or use an old picture frame with the glass removed
- netting or fine-mesh fly screen
- drawing pins or small tacks
- newspaper or toilet paper
- bucket in which to prepare your “pulp”
- a kitchen appliance – your hand blender
- several towels and absorbent cleaning cloths
- a waterproof layer to protect your surface – such as a large bin bag or waxed tablecloth
- a rolling pin
- a bathtub or flat plastic tray, slightly larger than the mould frame
- hot water
- washing line or clothes airer for drying
Optionally
- coloured paper serviettes or water colour paints to add a touch of colour- dried petals or small leaves
Making the pulp
Tear the newspaper into small strips and if you wish add something coloured and tiny snippets of serviette paper for some colour in the paper when it’s finished.Mix the paper with hot water to make a pulp. Leave it to stand overnight and blend it down the following day with the hand blender.
Making your own mould frame
Cut the fly screen or netting to the shape of the picture frame, allowing approximately an extra five centimetres all round. You can pull the material tighter if you fold it over once at the edge, then it won’t tear. Tack it in place, and there you have your frame – which incidentally you can also buy.First the screening …
You fill the tray half full of water and add your pulp. The more there is, the thicker your paper will be. Stir it all together. Dip your frame into the water, first tipping it and then holding it horizontally, so that the mixture can spread evenly over the frame. Once you’ve taken the frame out of the water, let it drip dry for another few minutes.If you want to decorate your paper, now’s your chance. Simply sprinkle a few dried petals onto the paper pulp and maybe add a few flourishes of colour with the water colour paints.
… then the rolling
Now you need your waterproof mat, on which you place a towel. Place a cleaning cloth over your paper pulp, which is still in the mould frame. Then tip the frame onto the work surface so that the pulp comes away from the frame. You might have to tap the frame a little. Spread another cloth over the paper pulp and use the rolling pin to roll the moisture out of your paper – you’ll need several cloths until the paper is almost dry and you can leave it to dry out completely on the airer. Once that’s done, the next step is to iron your pages and sheets on a medium heat.I hope you have lots of fun making paper – and of course a successful result. May you receive as many cheery letters and cards as possible at this dark time of year.
Sending you warmest wishes!
Yours, Trude
November 2020
